Sunday, February 23, 2014

sign-in with linkedin with js API - learnmore at www.i-visionblog.com

LinkedIn provides excellent sign-in system to enable the user to login and experience the privacy via profiles.so,LinkedIn documentations are very helpful in nature and provides excellent explanation towards purpose. LinkedIn is professional profile website that can create jobs,connections and various aspects.it has both free service and paid up-gradable services.So,let us see about the sign-in with LinkedIn for our website.
first go to Application create site and register your application with ACCURATE DOMAIN ADDRESS that include sub-domain and port option also.in the JS API text area with comma if multiple address and get your APP_KEY.
sign-in with linkedIn -s.shivasurya i-visionblog.com
sa

DEMO -take a demo rite here

JavaScript for Authentication:

<script type="text/javascript" src="http://platform.linkedin.com/in.js">
  api_key: YOUR_API_KEY
  authorize: true
</script>

this script is used to show the sign-in button and check the user had already authenticated using the particular app.

Javascript for displaying Info:


<script type="IN/Login"> 
<form action="/register.html"> 
<p>Your Name: <input type="text" name="name" value="<?js= firstName ?> <?js= lastName ?>" /></p>
<input type="hidden" name="linkedin-id" value="<?js= id ?>" />
<input type="submit" name="submit" value="Sign Up"/>
</form>
</script>

replace your app id and save it as html file.final code that appears below.

html code:

<html>
<head>
<title>linkedin API login</title>

<script type="text/javascript" src="http://platform.linkedin.com/in.js">
  api_key: your app_key
  authorize: true
</script>
  <meta http-equiv="Content-Type" content="text/html; charset=UTF-8" />
  <script type="text/javascript" src="http://code.jquery.com/jquery-1.5b1.js"></script>
  <script type="text/javascript" src="https://ajax.googleapis.com/ajax/libs/jqueryui/1.8.7/jquery-ui.min.js"></script>  
</head>
<body class="yui3-skin-sam yui-skin-sam">
    <script type="IN/Login"> 
<h1>welcome,<?js= firstName ?><?js= lastName ?> </h1>
<p>Your Name: <input type="text" name="name" value="<?js= firstName ?> <?js= lastName ?>" /></p>
<input type="hidden" name="linkedin-id" value="<?js= id ?>" />
</script>
</body>
</html>


some common issues:


1)since we are using <?=js this may have effect in PHP short tags so i am making this project inside a directory and created .htaccess and switched off the short tag using the code in .htaccess file

2)Sometime while loading the page and you would not see the sign up botton at the page,so don't worry, just check your domain properly registered at app settings at linkedin developers app page.And if error occurs check out the console at the browser.

if you experience any errors just notify as comments.share is care.

Saturday, February 22, 2014

working with maplace.js for google maps API- learn more i-visionblog.com

I was working with Google maps API :) and i was interested in finding the plugins to load Google map instantly into web pages using Javascript to enhance better views and control the maps using controllers.The world is now relies on Maps which makes our life automated by finding places using maps using google and bing.I found excellent plugin to load maps instantly using maplace.js and using JQuery and google maps API.
                               Download - maplace.js

This map is derived from maplace.js

How to install the plugin:

the set up was quite easy as like other plugins we could just ad the maplace.js and we could call the functions with the specified arguments like location etc.
rite here is the code to ad the plugin!

<script src="http://maps.google.com/maps/api/js?sensor=false&libraries=geometry&v=3.7">
</script>
<script src="http://code.jquery.com/jquery-1.9.0.min.js"></script>
<script src="maplace.js"></script>

Functions with options:

new  Maplace({   your desired options  }).Load();
This function enables to call the function to load the map in to div tag.with various options we could control the content to be loaded in the div tag for the websites.There are numerous options to handle the data ,here i'm describing only the basic content.For more options visit the official site here - maplace official site 

options:

latitude of earth         : lat   eg : lat: 45.9
longitude of earth     : lon eg : lon:10.9
title for link : title: 'Title A1'
html : your html coding here.
icon : icon url for marker
zoom : zoom level for focusing marker
show_infowindow : boolean value

by default the div tag for loading content is #gmap and for control is #control over the map
so let us see the HTML code to display the map.
<div id="gmap"></div>
<div id="controls"></div>
This id's in div are default and could display the map inside the div and show the controls.
we could change it by using the options given below.


further options in detail
i have a given simple example to show the particular latitude and longitude to show on google map.Just follow the codes.

<html>
<head>
<script src="http://maps.google.com/maps/api/js?sensor=false&libraries=geometry&v=3.7">
</script>
<script src="http://code.jquery.com/jquery-1.9.0.min.js"></script>
<script src="/home/shivasurya/maplace.js"></script>
<script type="text/javascript">
$(function() {
new Maplace({
locations:
[{
lat: 49.9,
lon: 10.9,
zoom: 8
}],
map_div: '#gmap-dropdown',
controls_title: 'locate:'
}).Load();


new Maplace({
locations: [{
lat: 25.9,
lon: 15.9,
zoom: 8
}],
map_div: '#gmap-list',
controls_type: 'list',
controls_title: 'locate:'
}).Load();
});
</script>
</head>
<body>

<div id="gmap-dropdown"></div>
<div id="gmap-list"></div>
</body>
</html>

i have given only just a demo about using maplace.js,it consist of numerous options to play with it visit the official site to integrate with the maplace.js.it consist of numerous of events options and integrations.share is care.report bug as comments.

Wednesday, February 12, 2014

working with webcam.js and php to upload images- learnmore i-visionblog.com

We all guys are fascinated towards uploading images via social networks by applications.Thus introduction of webcam made a lot of changes as such direct upload of images and video calling starting from skype to viber,hangouts in G+ plays a major role in the information sharing and visualizing.and this post will give a start up on the accessing webcam via browser and uploading using PHP and managing them with MySQL database in backend.

webcam.js - resource
                                                           
Let us create a table named images :
create a images folder before trying it.

CREATE TABLE IF NOT EXISTS `image` (
`images` varchar(1200) NOT NULL,
`id` int(11) NOT NULL AUTO_INCREMENT,
`name` varchar(1000) NOT NULL,
PRIMARY KEY (`id`)
) ENGINE=MyISAM DEFAULT CHARSET=latin1 AUTO_INCREMENT=1 ;


Let us Know about javascript functions of webcam.js
<script type="text/javascript" src="webcam.js"></script>
<script language="JavaScript">
document.write( webcam.get_html(440, 240) );
</script>
this functions enable to show the cam in your browser.you can mention the size of the cam to present in your browser.
<script  type="text/javascript">
    webcam.set_api_url( 'handleimage.php' );
webcam.set_quality( 90 );
webcam.set_shutter_sound( true ); // play shutter click sound
webcam.set_hook( 'onComplete', 'my_completion_handler' );

this function set initial value for API url to process our image and save in uploads.and other functions are just attribute such as sound,quality and calling the functions.
function take_snapshot(){
document.getElementById('img').innerHTML = '<h1>upload on progress</h1>';
webcam.snap();
}

This function is initiated when the user triggers the snap button.when the user clicks the button Just show loading status message and call the function webcam.snap() to capture the image through the webcam.

function my_completion_handler(msg) {
// this is used to extract the url php output
if (msg.match(/(http\:\/\/\S+)/)) {
//the above expression is to verify the match url output
document.getElementById('img').innerHTML ='<h3>Upload Successful</h3>'+msg;
    // show JPEG image in page
document.getElementById('img').innerHTML ="<img src="+msg+" class=\"img\">";
//initialize the camera once again
webcam.reset();
}
else {alert(" Error occured! we are right now down to take photoshoot : " + msg); }
}

This function is called to handle the error or success of image upload and helps to display image and initialize the webcam once again.
so now let us code for the backend handleimage.php
<?php
session_start();
$_SESSION['id']="1";
$id=$_SESSION['id'];
include 'connection.php';  //assume you have connected to database already.
$name = date('YmdHis');
$newname="images/".$name.".jpg";
$file = file_put_contents( $newname, file_get_contents('php://input') );
if (!$file) {
print "Error occured here";
exit();
}
else
{
    $sql="insert into image (id,name,images) values ('','$id'.'$newname')";
    $result=mysqli_query($con,$sql);
    $value=mysqli_insert_id($con);
    $_SESSION["myvalue"]=$value;

}
$url = 'http://' . $_SERVER['HTTP_HOST'] . dirname($_SERVER['REQUEST_URI']) . '/' . $newname;
print "$url\n";
?>
This enables to get your image file using the file_get_contents().here is a small explanation php://input -read article here.
and adding the image path to the database table with id,name and path.and we are just printing the url of the image with our environment variables in PHP.
so,now let us design our index.php.
<html>
<body style="background-color:#dfe3ee;">
<div id="outer" style="margin:0px; width:100%; height:90px;background-color:#3B5998;">
</div>
<div id="main" style="height:800px; width:100%">
<div id="content" style="float:left; width:500px; margin-left:50px; margin-top:20px;" align="center">
<script type="text/javascript" src="webcam.js"></script>
<script language="JavaScript">
document.write( webcam.get_html(440, 240) );
</script>
<form>
<br />
<input type=button value="Configure settings" onClick="webcam.configure()" class="shiva">
&nbsp;&nbsp;
<input type=button value="snap" onClick="take_snapshot()" class="shiva">
</form>
</div>
<script  type="text/javascript">
    webcam.set_api_url( 'test.php' );
webcam.set_quality( 90 ); // JPEG quality (1 - 100)
webcam.set_shutter_sound( true ); // play shutter click sound
webcam.set_hook( 'onComplete', 'my_completion_handler' );

function take_snapshot(){
// take snapshot and upload to server
document.getElementById('img').innerHTML = '<h1>Uploading...</h1>';

webcam.snap();
}

function my_completion_handler(msg) {
// extract URL out of PHP output
if (msg.match(/(http\:\/\/\S+)/)) {
// show JPEG image in page

document.getElementById('img').innerHTML ='<h3>Upload Successfuly done</h3>'+msg;
 
document.getElementById('img').innerHTML ="<img src="+msg+" class=\"img\">";


// reset camera for another shot
webcam.reset();
}
else {alert("PHP Error: " + msg); }
}
</script>
  <div id="img" style=" height:800px; width:500px; float:left; margin-left:40px; margin-top:20px;">
</div>
</div>
</body>
</html>

let us add some cool CSS code :
<style type="text/css">
body{
margin:0;
padding:0;
}
.img
    { background:#ffffff;
    padding:12px;
    border:1px solid #999999; }
.shiva{
 -moz-user-select: none;
    background: #2A49A5;
    border: 1px solid #082783;
    box-shadow: 0 1px #4C6BC7 inset;
    color: white;
    padding: 3px 5px;
    text-decoration: none;
    text-shadow: 0 -1px 0 #082783;
    font: 12px Verdana, sans-serif;}
</style>

I am leaving on your side to make alteration if need for getting image and rename + uploading and other sorts of make ups.this is the basic to get the image and save it in a folder named images.
report any bugs as comments.share is care, please share it.

Sunday, February 09, 2014

Creating Website using C programming Language - read|more at i-visionblog.com

C program is a powerful programming language.number of web interpreter languages and database are built by this C language.even unix,Most of Windows and other basic network are driven by the C language.we can't imagine without c language and thanks to Dennis.So,we are going to built a simple website using c program and compile using GCC compiler and execute as CGI using Apache server.Thanks to Shuvojit Sarkar - programmer for configuring my linux environment successfully.

Requirements:

Apache server 2+ version is most preferable(Apache 2.2.22)
GCC compiler 
Text Editor :D

configure Apache server:

Assuming you have already Apache server running or follow below instructions
 sudo apt-get install apache2 

after installation try to open your browser and visit your localhost and it should show the message Working!


You will need to use the CGI interface of Apache 2 webserver. So first find out the path for the cgi-bin directory. You can see it in the /etc/apache2/sites-available file where it mentions:
   ScriptAlias /cgi-bin/ /usr/lib/cgi-bin/
    <Directory "/usr/lib/cgi-bin">
        AllowOverride None
        Options +ExecCGI -MultiViews +SymLinksIfOwnerMatch
        Order allow,deny
        Allow from all
    </Directory>

   ErrorLog ${APACHE_LOG_DIR}/error.log
Finally it should look like above.If you dont have just try to copy it and configure it.

check now http://localhost/cgi-bin/ works without any errors,i mean with error message of Forbidden

Now let us code C language to run in Web browser.
there are two ways to running C program to run in web browser via apache server.
1)the first way is to directly code the html codes in printf(); function which would be tough in huge file of html.
2)the second way is to create txt file and using file operation to import the text file and read it using the loop concept and generate html codings.
hope you got the clear idea on this.

Code easily:

 create a C file using text editor.

#include <stdio.h>
int main()
{
    printf ("Content-Type: text/html\n\n");
    printf ("<html>");
    printf ("<head><title>C-Html sync</title></head>");
    printf ("<body>");
        printf ("<img src=\"https://lh5.googleusercontent.com/-kTNnF876PYk/AAAAAAAAAAI/AAAAAAAAAus/QLD7dahdifE/s120-c/photo.jpg \"");
     printf ("This page is created by a C program.<br />");
    printf ("I love to share my ideas to the world <strong>bold</strong> and <em>italic</em> text.");
    printf ("</body> </html>");
    return 0;
}

we had created the C file and time to compile now using GCC compiler.
change it to the present working directory for compiling.

$ cd <preferable directory>

compile and it should be successful compilation.

$ gcc file.c

just run your output and see .

$ ./a.out

have a look at my screenshot for visual reference.
after successful compilation now we are in the stage to create application/executable that runs on apache server in the cgi-bin directory.

$ gcc -o <your preferred executable name> <space><c program file name>

eg: $ gcc -o index file.c

now it's time to test your file using cgi-bin directory

$ sudo cp index /usr/lib/cgi-bin

this prompt for root password and copy the file to cgi-bin directory using sudo cpy command.

open your browser test your file as 

http:/localhost/cgi-bin/index   - awsome awaiting for you!


so the above method is some difficult to code huge html page.so, i have decided to try file operation in c programming.

steps:

i have coded the normal <html> page and saved as input.txt file in my own dorectory.
next step is i had made the c program to load the input file and read the file line by line and create output as html tags.

have look at c program coding:

#include<stdio.h>
  int main()
    {
            FILE *ptr_file;
            char blog[1000];
printf ("Content-Type: text/html\n\n");
            ptr_file =fopen("input.txt","r");
            if (!ptr_file)
                return 1;

            while (fgets(blog,1000, ptr_file)!=NULL)
                printf("%s",blog);

        fclose(ptr_file);
            return 0;
    }

the file operation opens the file input.txt in read mode and we have declared ptr_file as pointer and blog character array as 1000.since we are going to read the file line by line and just executing printf statement ,assuming that i dont have more than 1000 characters in single line.and followed by verification of file existance ans using while loop and condition is end of the line must have a null character or new line character and stopping there and thus moves to next line and proceeds till the file is completely read.And we close the file.

thus just code your input.txt file with html codings on your way.
my coded input.txt

<!DOCTYPE html PUBLIC "-//W3C//DTD XHTML 1.0 Transitional//EN" "http://www.w3.org/TR/xhtml1/DTD/xhtml1-transitional.dtd">
<html xmlns="http://www.w3.org/1999/xhtml">
<head>
<meta http-equiv="Content-Type" content="text/html; charset=utf-8" />
<title>Shivasurya iniatives</title>
<style type="text/css">
.nav {
    width: 100%;
    float: left;
    margin: 0 0 3em 0;
    padding: 0;
    list-style: none;
    background-color: #f2f2f2;
    border-bottom: 1px solid #ccc;
    border-top: 1px solid #ccc; }
.nav li {
    float: left; }
.nav li a {
    display: block;
    padding: 8px 15px;
    text-decoration: none;
    font-weight: bold;
    color: #069;
    border-right: 1px solid #ccc; }
.nav li a:hover {
    color: #c00;
    background-color: #fff; }
</style>

</head>

<body style=" margin:0px;background-color:#FFE7E7;">
<div id="s_01" style=" height:120px; width:100%; background-color: #900;">
<img src="http://www.tce.edu/sites/default/files/header.png" style="margin-left:100px;"  />
</div>
<div id="s_02" style="width:100%;">
<ul class="nav" style="width:100%;"><li class="first leaf"><a href="/" title="" class="active" style="margin-left:110px; ">Home</a></li>
<li ><a href="/about" title="">About TCE</a></li>
<li><a href="/Academics" title="">Academics</a></li>
<li><a href="/admission" title="">Admission</a></li>
<li><a href="/departments" title="">Departments</a></li>
<li><a href="/Research" title="">Research</a></li>
<li><a href="/contact" title="">Contact Us</a></li>
</ul>
</div>
<div id="main">
<img src="http://www.tce.edu/sites/default/files/banner/wrappergreen.jpg" style="width:100%; margin-top:-50px;" />
</div>

<div id="r1" style="height:auto; margin:20px;font-size:80%;">
<div id="m0" style="height:30px; width:350px;background-color: #FF5050;line-height: 30px;">&nbsp;&nbsp;&nbsp;<b>About</b></div>
<div id="m1" style="height:100px; width:350px;background-color: #FFADAD;">
<div style="margin-left:10px;">
<div style="height:33px;line-height: 33px;">
Founder: <b>Karumuttu Thiagarajan Chettiar</b>
</div>
<div style="height:33px;line-height: 33px;">
Located in <b> Thiruparankundram,Madurai</b> </div>
<div style="height:33px;line-height: 33px;">
Establishment Year: <b>1957 </b></div>
</div>
</div>
</div>
</body>
</html> <! shivasurya productions !>

and now create the application/executable file using compilation process.

gcc -o mainhtml file.c

now copy the both executable and input.txt file to cgi-bin using sudo commands.

$ sudo cp mainhtml input.txt /usr/lib/cgi-bin

verify using $ echo $?   must return 0 for success.

now it's time to check the website.go to http://localhost/cgi-bin/mainhtml

my output based on input.txt file :

using c program we could get query and combine database functionality using mysql C API.i will describe in detail in my next post.
feel free to share and comment guys!find out bugs if any an notify me via comments or contact by [email protected]


Sunday, February 02, 2014

Bridging the gap between HTML5 & Smartphone application -read more @i-visionblog.com

The world is now driven now by Applications in Smartphones.As according to Mashable.com the whole world uses the Application in Smartphones.Thus integrate your website from web browser to your Smartphones.Let us use HTML5 and Phonegap to build your application.Additional to that we could just use jQuery Mobile to handle the website efficiently that supports numerous device.so,let us discuss about the jQuery mobile + Html5 + Phonegap to build successful Android,i-OS,Windows 8,Web OS,Blackberry.


HTML5:

html5 enables you to create awsome markup and structure for your layout in application either may be a Smartphone application  or web browser application.Most of the browser supports html5,taking it as an advantage we could successfully create a markup or a plan for your application.It  has advantages of integration of new <video>, <audio> and <canvas> elements, as well as the integration of scalable vector graphics (SVG) content.


JQuery mobile:

JQuery Mobile enables the user to interact with the device and provides an excellent environment for the users.And taking this as advantage programmers can many function based on their particular event.for example ajax request on clicks or on hover.Thus jquery mobiles provides excellent tutorial about their usage in html5.


Phonegap:

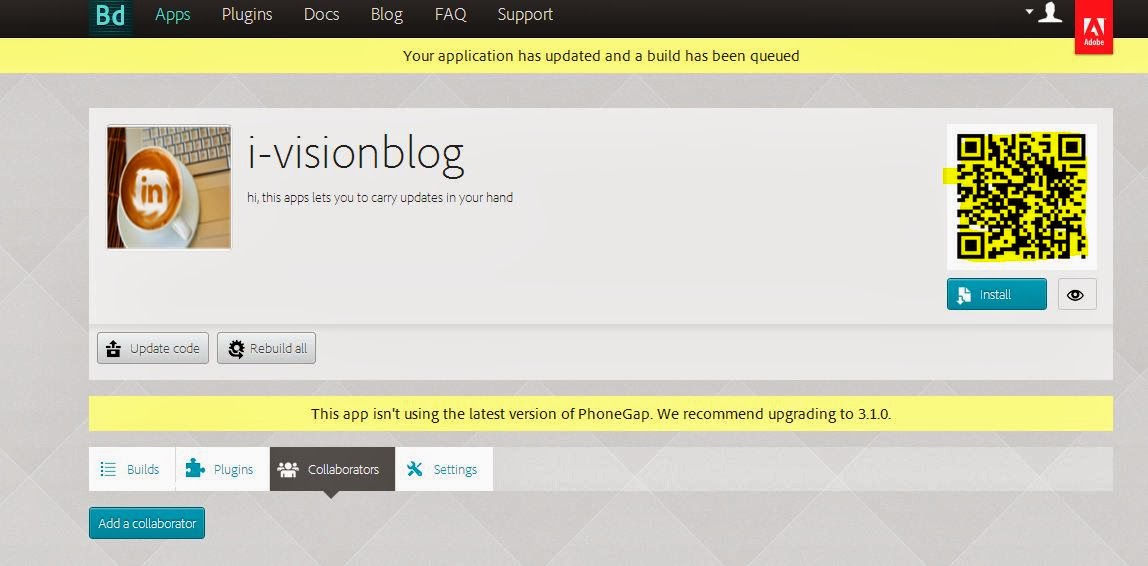
and finally comes here phonegap which is lead by Adobe now.provides us to create application by online uploading and downloading as number of apps for  Android ,i-OS,Blackberry ,Windows 8 ,Web OS,Symbian.The adobe lets you cloud service for building your application within a secondes and makes ready for download.


Procedure:


1)Just use HTML5 + JQuery Mobile create your simple web application and check it with your browsers that are capable of html5.
2)You must have an Adobe ID account or GIT hub account try the Conversion of html in to application that supported in Smartphones
3)Here,i have signed with GIT hub Account.
note: Phonegap Allows you to create 1 Application for free by uploading it privately,where it allows numerous unlimited by making it open source file using git hub and pull the request from there to create your application.
4)Upload your files with Private apps section and make your source file as .ZIP file and upload it.
5)After successful upload you would be shown with the mobile apps that is ready to download and install in your Smart phones as seperate files that includes Android ,i-OS,Blackberry ,Windows 8 ,Web OS,Symbian.
6)you can provide Name,Logo,Description,Version,package name and managing collaborators and enabling debug options.
so, this Phonegap webservice on cloud helps you to create smart phone Application with minimum efforts!

please mention the bugs if you could find it.feel free to comment below.share is care.